 [DB] Oracle Database Express Edition 11g 시작하기
1. Oracle Database Express Edition 11g 설치 - http://www.oracle.com/technetwork/indexes/downloads/index.html 에서 다운 가능하다. - Express Edition는 무료버젼이며, 한 명의 uesr만 사용 가능하다. - 다운 받기 위해 회원가입을 필요로한다. - 설치버젼 : Oracle Database Express Edition 11g Release 2 2. Oracle SQL Developer 실행 - 마찬가지로 http://www.oracle.com/technetwork/indexes/downloads/index.html 에서 다운 가능하다. - 파일 다운로드 후, 압축을 풀고 설치없이 sqldeveloper.exe 를..
 [System] 우분투(Ubuntu) 설치
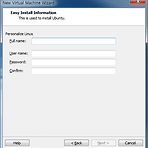
1. VMPlayer 다운로드 https://my.vmware.com/web/vmware/free#desktop_end_user_computing/vmware_player/5_0 2. 우분투 다운로드 http://www.ubuntu.com/download/desktop 3. 우분투 설치 진행 시, 아래화면에 적는 것이 계정이름과 로그인 암호가 된다. 4. root 계정 암호 설정 sudo passwd root 5. X-Window 설치 sudo apt-get install xinit sudo apt-get update sudo apt-get upgrade sudo apt-get install ubuntu-desktop startx 6. Terminal 창의 위치 7. VMware Tool 설치(아래 그림..
타겟단말 : 겔럭시 S 우분투 버전 : 12.04 1. VMPlayer 및 Ubuntu 설치 [System] 우분투(Ubuntu) 설치 2. Ubuntu 이미지 만들기 $wget http://launchpadlibrarian.net/52888742/rootstock_0.1.99.4-0ubuntu1_i386.deb $sudo apt-get install qemu-kvm-extras-static qemu-kvm-extras debootstrap fuseext2 fuse-utils genext2fs $sudo dpkg -i rootstock_0.1.99.4-0ubuntu1_i386.deb (만약 failed to run command `debootstrap/debootstrap 과 관련된 메시지가 나온다면, ..
Windows -> Preferences -> Run/Debug -> Launching : Launch Operation에서 Always launch the previously launched application 선택 Windows -> Preferences -> Run/Debug -> Launching -> Launch Configurations :Filter check launch configuration types: 체크 후, 가장 하단에 있는 XSL체크 Apply 후 종료
package kr.priv; import android.app.Activity; import android.os.Bundle; import android.widget.TextView; public class Test_handler_btnActivity extends Activity { TextView show; @Override public void onCreate(Bundle savedInstanceState) { super.onCreate(savedInstanceState); setContentView(R.layout.main); MD_test test = new MD_test(); show = (TextView)findViewById(R.id.show); MD_test.OnReceiveResult..
package kr.priv.android_sdcard; import java.io.File; import java.util.ArrayList; import java.util.List; import android.app.Activity; import android.os.Bundle; import android.os.Environment; import android.util.Log; import android.view.Menu; import android.widget.ArrayAdapter; import android.widget.ListView; public class AT_main extends Activity { List mFileNames = new ArrayList(); @Override publ..
package kr.priv.android_gcm; import android.app.Activity; import android.os.Bundle; import android.util.Log; import com.google.android.gcm.GCMRegistrar; public class AT_main extends Activity { @Override public void onCreate(Bundle savedInstanceState) { super.onCreate(savedInstanceState); setContentView(R.layout.main); registGCM(); } private void registGCM() { GCMRegistrar.checkDevice(this); GCMR..
Notification notification = new Notification(R.drawable.ic_launcher, getText(R.string.app_name), System.currentTimeMillis()); Intent notificationIntent = new Intent(this, AT_main.class); PendingIntent pendingIntent = PendingIntent.getActivity(this, 0, notificationIntent, 0); notification.setLatestEventInfo(this, "test", "test2", pendingIntent); startForeground(12345, notification);
- Total
- Today
- Yesterday
- springboot
- call back
- 정렬
- 그라파나
- Independentsoft
- 선 없이
- elasticsearch
- java
- setDoInput
- 링크드리스트
- PoolingHttpClientConnectionManager
- Stack
- docker
- 빌드 세팅
- 암호
- sort
- code push
- 안드로이드
- insertion
- 스머핑
- react-native
- 과거 버전 사용
- 443
- Queue
- 개발 설정
- LinkedList
- Gradle
- Windows 서비스 등록
- array
- 젠킨스
| 일 | 월 | 화 | 수 | 목 | 금 | 토 |
|---|---|---|---|---|---|---|
| 1 | 2 | 3 | 4 | 5 | ||
| 6 | 7 | 8 | 9 | 10 | 11 | 12 |
| 13 | 14 | 15 | 16 | 17 | 18 | 19 |
| 20 | 21 | 22 | 23 | 24 | 25 | 26 |
| 27 | 28 | 29 | 30 | 31 |
